Tuesday, September 13, 2016

Mint Jelly


Mint Jelly

I made a double batch, the yield was 13, 8 oz. containers.
When looking up recipes there are MANY to choose from.
I went with Fresh Eggs Daily's that used water & less sugar. Recipe HERE
From start to finish picking the mint, washing, drying, cooking and canning it = 6 hours.

If however, you are using older mint.
Mint you bought from the store, a neighbor gave you or you purchased a farmers market
I'd advise using THIS recipe.
It uses apple juice instead of water.
Fresh picked I didn't need any extra sweetness or flavor, the taste was amazing and strong!
Older mint - still soft and live, but not fresh picked might need a boost.


Again I don't add dyes to food.
This is dye free mint jelly and TRUST me its amazing!
 
Next year I think I'll buy more of these tiny jars and make up a few extra batches in the spring when my mint patch really takes off!
These will be perfect for presents & for using with all sorts of dishes.
I can't wait to try it with roasted rabbit!

Monday, September 12, 2016

Canning Cucumbers


 HOT DAMN Pickles!
AKA
Mondo's Hot & Spicy

My modifications to the recipe were due to me being terrified of how hot these are going to be.
I omitted the peppercorns since I was using 2-3 birds eye chili peppers per jar.
For those that don't know Birds Eye Chili's rate on average 70,000 on the heat scale.
Standard Jalapeno's are between 10,000-15,000.
Due to changing up the heat ratio I also changed the name of mine to Hot Damn Pickles!


These were seriously the prettiest pickles I've canned!
I used fresh picked cucumbers & my home grown garlic & dill for the recipe!
Using Dill seeds instead of dill weed since most of my dill had already died off. Next year I will harvest my dill and cucumbers together using the first batch of ready cucumbers instead of the last batch for this recipe!
In one day I managed 15 quarts and 1 pint of Garlic Dill pickles!
The one pint was ONE entire cucumber!
It was too pretty to split up and quite a challenge to fit into the jar but I made it!


Next time I make these I'm going to cut the onions in half!
Seriously that's a LOT of onions per jar & per pickle ratio!


Sweet Pickles

THESE are the BEST pickles EVER!!!
They take 7 days.
Not kidding 7 days of water treatments to do them correctly.
This is what sold me on canning pickles forever!!!
I can't share my recipe as I got it from a very old, "The New Pillsbury Family Cookbook".
Pretty sure you can find a copy at most any used book store for a few dollars.
I did cut the sugar amount down from 8 cups to 5 cups.
Two years ago they were amazing but too sweet.
I've already tried some and even with the lower sugar amount they are divine!
I have one more batch soaking now (day 4) when they are done so are my pickle days for this year!


This link takes you first to my blog on pickle relish which has a link to the recipe.

Now on my previous post about pickle relish I mentioned that a massive ton of my pickles were turning yellow and orange.
I looked it up - anything from watering, not enough fertilizer, to them being on the vine too long can cause the color to change.
The sites were really ridiculous about how once the color changed they were worthless and bitter.

We tasted ours and they were still perfectly amazing.
Sweet, crunchy and crisp.
No weirdness just yellow.
Also they smelled amazing when cut!

My advice to you - check your product before you toss.
If it looks good, smells good and tastes good - its good.

Saturday, September 3, 2016

Jalapeno Peppers!


This recipe said it would make 6 8oz jars. 
It made 9 1/2 jars for me.
Looks AMAZING! 
The few drops I tasted having me drooling for Thanksgiving when I plan to serve this.
If you want the store bought deep green you can add food coloring to the recipe,
I have ISSUES with America's fad for brightly colored food and avoid all dyes like the plague.

What started me on Jalapeno Peppers during Cucumber season?
My amazing next door neighbors brought over full box of their produce leftovers!
Jalapenos, onions, green peppers and tomatoes!
Most of which will go into my pickles, however, the Jalapeno's were just to pretty not to can!


Now this recipe made 1 pint so I had to triple it for my three pints.
See the space at the bottom?
That's after pushing them down and pushing them down and pushing them down some more!
 I'm not a huge pepper person but this year I keep getting them!
I love these on my favorite food of all time, nachos!
 
 
~~~~~~~~
 
Side note: For the first recipe I used gloves while cutting up the jalapenos.
For the second recipe I forgot.
DON'T FORGET THE GLOVES!!!!
 
Jalapeno burns are a @$$$#% to get over but thankfully they don't do much damage to the skin.
No boils or skin damage save some redness,
the pain however,
lets just say when I forgot I'd boiled some water for my canning jars and reached in, I didn't notice a difference to my fingers.


Wednesday, August 31, 2016

Sweet Pickle Relish


When we came home from a week of camping I found that several of my large cucumbers had turned yellow!
Not sure yet if it was too much water or if they were too long on the vine, that I will need to research  later.
First up was salvaging them
Hence turning them into Sweet Pickle Relish!

A whole pot full!


We made 6 quarts of Sweet Pickle Relish 
and for the first time I had a can explode!
Not due to any error but my own.
I made a rookie mistake from being over tired as I was finishing the process that led to losing one whole quart of amazing deliciousness.

Link above for the recipe.
We needed to quadruple the recipe
As much as we used I barely dented my cucumber crop!
Next up Sweet Pickle Chunks & Spears.
Quickly followed by Jalapeno Pepper Jelly & Mint Jelly
Ending with Dill Pickles & Dill Spears
Not sure how long this is going to take me but its a safe bet that I'm going to be canning off and on for the next month.

My world is full of spices, jars and boiling water!
Hope everyone else is having a great and safe time with their gardens!


~*~

OH! On a side note, please don't take short cuts when it comes to canning.
On one of my homesteading boards I saw someone wanting to stack cans in the canner,
many other people wrote in about how they routinely stack their smaller jars in their canners.
I do not recommend this.
Canning isn't like freezing or putting rice in a plastic bottle.
Canning is a process of using water and pressure to make your jars airtight..
If something fails you AT BEST will get sick from eating it.
Take the extra 10-20 minutes to do it correctly.
Its worth it.

Tuesday, August 30, 2016

Canning Apples!


Weeks of apples! Apple Cider, Apple Sauce, Apple Butter, & Apple Pie filling!
At this point I don't know if my arm will recover but hey my house smells divine AND I have a massive stock of really yummy food!


I used two different recipes for my Apple Pie Filling, I highly recommend the first!

I used my full 1 pd of Clear Jel and made over 12 quarts of Apple Pie Filling that tastes seriously amazing and looks stunning canned.
This still tastes amazing.
HOWEVER
It took forever for the liquid to gel correctly.
Seriously doing a large batch took almost an hour for it took cook correctly.
Taste wise I adore this, but frankly I most likely will use this as Apple Pie Topping
(on ice creams, as a dip ect)
Not pictured, doesn't can as pretty
Also due to the high heat I couldn't sub the cornstarch for arrowroot powder.


Now I used this recipe more as a starting off point.
I used only Granny Smith's, quadrupled the recipe and cooked it up in a roasting oven on 150 for almost two days.
Then I water bathed them according to my pressure cookers instructions for their Apple Butters recipe.
Oh and right before I pureed them into amazing tastiness I tossed in a tsp of vanilla.
This is heaven!
I'm not even normally a fan of apple butter - this however is the most amazing thing!
Rich, vibrant, caramelized smooth goodness!


Again I used a recipe more as a starting off point.
First word to the wise - this recipe is actually for Apple Juice and maybe if you were using something other than Granny Smiths it might taste okay.
Using Granny Smiths this apple juice recipe SUCKED.
Instead I flipped it, turned it into Apple Cider with a by product of reusing the mushed apples as apple sauce.
For the Apple Cider you toss in a cinnamon stick & a few bags or package of mulling spices.
Along with 1 C. of white sugar.
Reboil it for 45 minutes and yum.

For Apple Sauce 
You removed the cooked, soft apples after 1-2 hours of hard boil.
Strain them from the juice, toss into a crock pot with 
1- 11/2 C. Sugar (according to taste)
1-2 tbls of ground cinnamon
1 tbls of ground nutmeg
1 tsp of ground cloves
 cook up for another few hours on low then add to hot jars and can following your pressure cookers instructions.

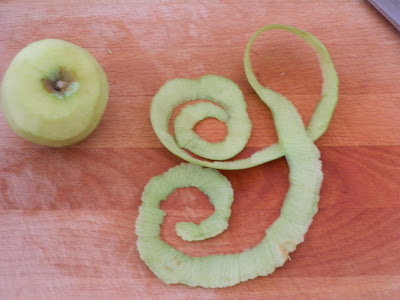
Also I'd like to make a note when keeping the apple peels in a recipe make sure you are removing the SEED POCKETS
They don't cook down. 
I have two cans of applesauce and 4 apple butter with tiny bits of hard bits as I didn't cut them out.
Take the time to remove them, its worth it in the long run!

Friday, August 19, 2016

Supplies


Still squealing like a kid!

My new apple over load already stretched what stores I had to the breaking point.
I have TONS of mason jars due to a wicked deal I was able to get last month.
180 quart sized canning jars for $40.00
A lady was moving and didn't want to drag them all with her.
MOST of them were brand new!
However,
they didn't come with lids or rings.
I've spent the last few days canning tons of Apple Butter & Apple Sauce jars.
So much that I emptied a full tote of apples, in the process I ran out of lids & bands.

Hence I'm still squealing like a child admiring my new toys!
Especially the Clear Jel!
A product I've never used before but I want to can tons and tons of Apple Pie Filling and my research has led me to believe that Clear Jel is by far the best way to go!
I'll post both the recipe and photos of them soon!
 

Thursday, August 18, 2016

Apple Picking


My hubs found a great offer on a FB Homesteaders page
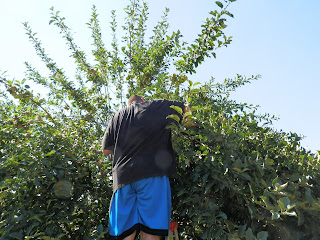
A woman had a tree in desperate need of picking but couldn't physically do it, afraid the branches would snap she wanted someone to come get the apples!
YAY!!!
The first photo is one branch from the inside of the tree, the branches are almost on the ground!


Here's the tree from the outside before we picked anything!
Looks like a shaggy bush!


Our buckets grew!


We left with 5 massive totes filled with Granny Smith apples
and a new friend!

Wednesday, August 17, 2016

The New & Improved Rabbit Watering System!


First we used a 55 gallon barrrel


Needing the height we built a support system to nestle it up in the rafter.


We drilled one small hole for the bottom of the barrel for the water line to come out


The large hole we cut into the shed 
(we plan on putting on a trap door)
This is the spout hole
We place the hose in this hole to refill it, 
covering it back up with an old cloth to keep bugs and wasps out,
while letting the container breathe so the water will flow out.

The tube then goes to the rabbit house, where they get cool fresh water!
Is this system perfect?
NO
As far as we can guess this will work for 9 months out of the year.
So far we don't have it winter proof, we'd need to change the tubing, adding a heating element.

For winter we plan on exchanging out the small water bottles that clip to the wire.
That is until we can afford to fix this system so that it works in winter as well.
 

Tuesday, August 16, 2016

Crook-Neck Squash


I have a process, for the sake of getting it all into one shot I made my counter a little messier. I'm sharing because a few people have mentioned that it seems like a lot of work - or they don't know how I do it all.

Harvesting four large crooked neck squash from my garden, I cut up two before the photo, left side you can see the two remaining squash.
The pile of skins is for my rabbits.
The pile of seeds in the middle of the board I dried, packaged in a marked brown paper bag for next years garden.
The one squash that had aged a little two much I cut the large seeded centers out, putting them in the scrap bucket for the chickens.

So you see four crook neck squash for dinner turn into - dinner for us, dinner (extra nibbles) for the rabbits, treats for the chickens and putting some aside for next years garden.
I love eating my garden, love enjoying a fresh side for dinner. I also love that with very little prep, there is NO WASTE.
Nothing from this batch heads to the compost and not one thing ends up in the garbage bin.

Even better saving a few of the best seeds, saves me the cost of seeds from a store while guaranteeing what year they were harvested and that they came from fresh, chemical free, healthy plants.

Why save the cost of seeds when they are only a few dollars a package?
Our garden this year alone:
10 packets of lettuce seeds.
3 carrots seeds packages.
2 radish seed packages.
3 squash seed packages
2 zucchini seed packages
5 corn seed packages
3 kale seed packages
1 spinach seed packet
3 pepper plants
4 raspberry plants
4 blackberry plants
8 tomato plants
1 basil plant
1 rosemary plant
& a large huge package of cucumber seeds

What I planted from previously saved seeds were my pumpkins. I also have dill seed & extra cucumber seeds. Last fall I planted half of my saved garlic bulbs as well a 1 new type.

We tried to plant sunflower seeds that I'd saved up from last year but my daughter got distracted when planting them and put the bowl on the ground - lets just say my chickens LOVE my daughter.
  
This year I'm saving the zucchini & squash seeds, pepper seeds from two different plants and tons of carrot seeds.
Each year saving a little more each time to cut next years budget down enough where I can afford to buy NEW veggies to add in - like potatoes! We want to try them again next spring!

So far in all the years I've saved up seeds and replanted from them they've grown great! What took me a few extra seconds in a meal prep can end up making a real difference.

Monday, August 15, 2016

What's Growing


Pumpkins!
So many pumpkins, all shapes and sizes!


Zucchini
I actually cooked this up tonight and it was fantastic!

  
Corn


Cherry Tomatoes
 

More Sweet Peppers!

Just in the large garden - the lettuce's second planting is growing well as well as my carrots!
I've already harvested all the orange carrot seeds and will be harvesting the multi colored heirloom carrots in a week or so!

This week is SUPER busy for me!
We harvested a large Granny Smith Apple tree and came home with a massive amount - I've been canning, cooking and digging through apples (post on them to follow in a few days).

Monday, August 8, 2016

Garden Projects


While I wasn't blogging, we were busy working in the garden!
We added a beautiful arbor fitting it perfectly in front of the gate into the garden.
If you look really close you can see we've already started some of the grapes to vine along it.
By next year it should be fully covered in grape vines!


I think it adds a nice welcoming look to the back garden!
The arbor pulls the eyes toward the upper yard, while inviting you in.


The last major project that took up a few weeks worth of time was to add in a special watering system.


This system gets the water straight to the roots of the plants.
Not wasting any water on the leaves or around the plants!
Cutting down burn damage from the sun, bug damage and helping cut down on my needing to weed so much around each bed.

This is a time consuming project.
Each line took at least a full hour. 
Pumpkins 1 hour. Cucumbers 1 hour. Corn 2 hours.
Blackberries & Raspberries 2 hours.
Kitchen garden 3 hours.

Add the fact that we did most the work in 103 - 101 degree heat and those hours felt very long.

Worth every minute!

We are still working on the side yard fence, the back garden fence 
(we need to hold up the raspberries)
and well as the grow out cages for the rabbits & the rabbit play yard.


Sunday, August 7, 2016

Fixed Cucumber Trellis


Our cucumbers were growing so well, that instead of thinning them like we should have we built extra trellis - in front to support the extra as well as using rope on the insides.


Here's a photo of what the inside of frame looks like

They are growing so well, so fast with so many cucumbers!
I'm going to have a wonderful harvest to play with!
I want to pickle - sweet pickles, dill pickles & possibly pickle relish!
So happy that we got a steal of a deal a month ago on canning jars! 
180 quart sized jars (most brand new) for $40.00


Massive to small my vines are loaded with cucumbers!
Best part of my summer!

Saturday, August 6, 2016

Chili Peppers!


So this week I made a fabulous trade with my next door neighbors! I traded 6 eggs and two heads of garlic for a small bucket of peppers!
Best that I can tell the small (very spicy) peppers are Birds Eye Chili's roughly a 70,000 on the heat scale. No I can't ask (I've tried) she doesn't know the English name for them.

I washed, dried and then hung them following this blogs amazing post on how to dry Chili's.


My full completed strand of peppers!


A close up of how the string turned out!

Already I am planning on planting some of the seeds for next year!
My neighbors has at least 50 of the tiny plants and each plant has 70-100 peppers like this growing on them! Each one just a beautiful as the next!

My cute adorable Banana peppers I've picked three off both my plants.
6 peppers off of 2 plants.
I have more growing and will get more but I love the amount of harvest she's been able to cultivate off of her plants!

Now I have a few that weren't lovely, they were blemished, bruised ect. Those peppers I am looking into making chili oil, chili paste & a few sweet chili sauces.

Friday, August 5, 2016

Harvesting Garlic & Dill


I harvested my dill/garlic patch a few weeks ago in mid July, right as the tips of the garlic were starting to die off but there was still green in the stalk.
We harvested more than what was shown above (Persian Garlic) we also harvested some lovely Elephant Garlic.
I had enough that I filled the basket in the photo and made a lovely long garlic braid that is hanging up down stairs (looking slightly sad and pathetic as it was my first time braiding garlic).


First off I'd like to say sorry for disappearing between my camera crapping out in the middle of garlic harvest (which is why I don't have the other photo's to share with you) and some deeply personal issues its been a rough summer.

Next I'd like to point out that we planted the garlic in last years dill bed - not truly paying attention to the fact that I might have missed some of the dill seeds I'd harvested.
The dill sprang up in early spring without me sowing even one seed and was by far the best fullest dill I've grown yet!

Which meant we needed to harvest the dill before we could harvest the garlic - not to much extra work but enough that I'm hoping I got the dill in time this year so I can move it to a better spot in the yard. A more permanent spot - when they call Dill a weed, its because its a tasty useful WEED.

This years garlic haul was fantastic! I have three different kinds both soft and hard neck. I think moving forward I'm going to lean toward the hard neck. I want my garlic harvest to last me from now until next years harvest!
It may or may not - we really like garlic!

As for the dill - I kept the best sections of dill, setting some aside to dry for me and some for my sister.
ALL the rest have been cleaned off and put into a large bin. I'm making up a massive container of dried herbs - Mint, Dill, Basil & Rosemary (this year anyway) to add into my chickens nesting boxes through out winter.
They are going to love it come winter time!

Wednesday, July 6, 2016

The Dirt Calls

I'm sorry that for the last few weeks I haven't posted anything. I am here. I am alive. Better yet, so is the garden!

Today I pulled out the bolting lettuce and replanted. This is normal. Since I plant so early in the spring and then thin and cut it so it regrows fantastic for a few months I am fairly good at getting the spring lettuce crop to last all the way into summer.
What I planted today normally (once grown) will last until late fall. I've been known to brush snow off the top of my lettuce box before finally calling it quits for the year.

I also planted some more tomatoes & winter squash of the Delicata Heirloom variety. I love the flavor and how easy it is to cut. Since I'm not selling it, taking it from garden to table is easy.
Delicata isn't easily found in stores or even farmers markets due to how easy it is to bruise.
The flavor however is between squash & sweet potatos!
Very yummy, very earthy and sweet.
I highly recommend it for any backyard garden! Also due to its white/green colors on the outside and bright orange hue on the inside its a very attractive plant to plate up for guests.
Another bonus is that the skin (again since its so thin) is edible and easily cut with a carrot peeler.

I have one squash in the yard (summer variety) that I will be able to harvest this week! Summer/fall is weeding/watering and trying to keep everything from frying under the hot sun!
Sorry I stopped posting everyday, its been tough to find time for everything!

So far I have carrots seeding, mint seeding & a few cilantro growing up from seed in the ground! I'm pretty exited, now fingers crossed that the cilantro grows back again next spring!
Our blackberry bushes are massive but the raspberry plants are struggling in the heat.

Also we were just able to salvage a ton of fencing material! The same fence we used for the herb garden may end up replacing the chain link in the front yard - we are unsure if we have enough to do the entire front yard but I do know we have enough to replace the yucky section that is falling down - so for now at least one section of the front yard will soon be done!

As for the bunnies we bred Zorro with Misty - but are unsure if she's pregnant or not. In the hopes that she is (and regardless as we will still need it in the future) we are ready to build the grow out cages!
We plan on doing it modular style this time to make it easier as the location is less friendly than the original set up.

I have tons to blog - photos galore and will try to start posting full time again soon!
Until then, remember - its a scientific fact that dirt makes you happier ;)

Sunday, June 19, 2016

Summer Time


The peas are doing fantastic - even with the chickens pecking through the fence stealing bits whenever they can!
We also planted Zucchini.
I don't have any gorgeous photos - only lovely dirt water wells that will soon become Zucchini.
 If you live in Northern Utah - Zucchini is a garden MUST.
You can't grow them wrong, they grow like weeds here!


I planted Cilantro in the corner of the herb garden. Hopefully this will be the perfect spot. Its full sun.
Which is why the Mint stopped growing into that area, the mint is massive but is reluctant to grow out into the sunlight, it prefers shade. I don't see that changing greatly no matter how invasive mint can be it really likes it cooler.

The Lavender I was trying start inside only had one seed sprout and then died off, so I will be trying to direct sow the seeds into the opposite corner - again.

I'd also like to add Oregano, Thyme and Rosemary. While I have tons of grand plans for this area - including hanging baskets off the fence for some smaller herbs.We add to our garden slowly. 
One thing at a time and see how it goes.

I've had several people ask me how I managed my gardens, chickens & rabbits and why I would talk about adding even more (bee's, aquaponics & a green house).
Its because we add one massive new thing a year.
Two years ago it was chickens.
This year rabbits.
Adding one thing to everything else makes it manageable for me. I don't get overwhelmed because I have a routine established and have already learned how to care and manage the rest.
Being a newbie on one subject, not all at once.

Being raised in a modern/urban world I didn't grow up with parents or grandparent's that had livestock and kitchen gardens. 
My grandma Thornton grew one plant (really well I might add)
but still only ONE.
I can only hope and pray next year I have enough Blackberries so I can make her Blackberry pie recipe.
That said, many people are coming back to self sufficiency.
Wanting to control their food source to eliminate GMO's, certain grains, chemicals, healthier animals, save money, no matter the reason - America in part - is coming back to nature.
Most of us are doing it alone, searching out books, online help and advice.
Learning by success and failure.

Which is why I will always be honest with you.
I will share my failures, as well as my successes.


Saturday, June 18, 2016

Planting the Tomatoes


When it comes to tomatoes we've had a rough time. 
This year we've finally ditched the dumb hanging planters that swear to give you large yields but last year netted us 3 tomatoes on three large amazing plants. This year we've already started out needing to doctor our tomato plants.


We've pulled out all the stops by adding fish heads & bone meal into each hole.
We planted 6 Homestead heirloom & 4 Sweet Million.
The homestead are large beefsteak tomatoes.
Sweet Million are cherry tomatoes that are supposed to vine down. 


Friday, June 17, 2016

Cucumbers


Moving them into full sun - really worked. There have been times I've not noticed a difference between full sun, partial sun and no sun regardless of the recommendations. 
Cucumbers, full sun is not optional, its a must!

I will thin them later - but with the trellis I shouldn't have to thin them as much as if they were fighting for space on the ground.
My worries of not having enough cucumbers this year should now be pointless! 
Whew! 
I really need a massive harvest this year! I want to make butter pickles, dill and sweet pickles. If I have enough pickles left over I want to make homemade pickle relish as well.
Of course starting so late in the year I realize I might not have as much as I would have if I had planted in the right spot at the beginning of summer.
Already these cucumbers with their first leaves are taller than the ones I planted two months ago that have their true leaves growing!
At least I have the perfect spot for growing them next year!

Thursday, June 16, 2016

Early Summer Garden


Our carrots are growing amazingly well this year! 
Soon we will start to thin them out, giving some to the rabbits.
Some will go into a salad for us, pretty much any carrot over an inch you can eat!
The two that are flowering and seeding will give me enough seeds for years to come.
Last year I learned an amazing recipe using cut carrots, butter and fresh dill - it was amazing!
Everything including the corn (not pictured) is growing well this year!

Already I'm on my second planting of lettuce 
(the two back boxes of lettuce)
The front sections of lettuce are still amazing!
Even though I've thinned them at least three times so far!


Fresh garden salads are one of my favorite summer dinners!
Toss on some boiled fresh eggs and YUM!