Wednesday, June 28, 2017

Our Fermented Feed Setup


Fermenting Chicken Feed

If you've had chickens for any length of time I'm sure that at some point you've run into links about fermenting your chickens feed.
The why, how and benefits will make you really want to.
However the set up, time and dedication... not so much.


Photo is of my ladies enjoying their 3rd morning of fermented feed.
Let me tell you right now, its true they adore it.
(Also please ignore the ugly pan in the background I used their distraction with the food to clean it and fill it.)


I went ahead and started fermenting my feed when I was finally able to find some cheap containers - namely, sand buckets from Shopko on sale for .99 cents each!

I already had the plastic plates that fit perfectly on the top of the buckets, keeping MOST of the air in, bugs out but allowing gas to escape as needed - perfect for fermenting!
Notice the post-its?
They have a heart, flower, star & cross, also they are numbered 1-4.
I will need a 4 bucket system in the winter as it takes longer to ferment in the cold.
In the summer so far I am using a 3 bucket system and it works fine.

My mix for 11 hens is 2 Cups laying mash & 1 Cup scratch.


Add filtered water (we have reverse osmosis - a must for living in Magna)
to roughly an inch above the grain.
After two days of fermenting the feed, you can pour the left over water (normally a cup or so) into the new fermented feed to get it fermenting faster.
Stir it a few times a day.

I use a fine mesh spoon to draw the grain out so that it won't be a puddle and I can re-add the water into the new feed.

So far this mix seems to be working perfectly for my ladies - once all 11 are laying I will tweak it as needed.
I've seen some recipes only use whole grains, I've read where they only use mash.
I'm doing a mix because I happen to have both.

Top reasons for me to start this?
To many mice seem to be eating what my ladies were tossing onto the ground.
I'd much rather my ladies actually eat their food, than other animals - especially dirty animals.
They eat this food so QUICK!
Nothing is left on the ground!
In time I might only do two cups and give my ladies their scratch in the evenings, as that helps with egg production but again that will be once all my hens are laying.


Fermenting Chicken Feed links:

My favorite with Mash
What Containers

Chicken Chick

More on why & how

Tuesday, June 27, 2017

Bunny Birthday Surprise!


Our doe Stormy's 3rd kindling, born this morning.
All 9 seem happy and healthy.
Which has been a fantastic birthday gift for me!

Stormy's 1st kindling died when she gave birth unexpectedly and her babies froze without a proper nest.
Her second kindling all but one baby (peewee) died and that one lived only because we were able to get her sister to foster Peewee with her kits.
This is her third kindling, we've redone her baby area completely and made sure this time she's alone.
Praying this time she shines as the mama we think she is.
9 healthy babies! Now its up to her to keep them that way!


Wednesday, June 21, 2017

Tiny Egg


Itty Bitty Teeny Tiny Ray of Hope!


This is a very small egg - still not sure if I'd call it a Fairy Egg,
but its close, its the closest we've ever come yet to a Fairy Egg anyway.

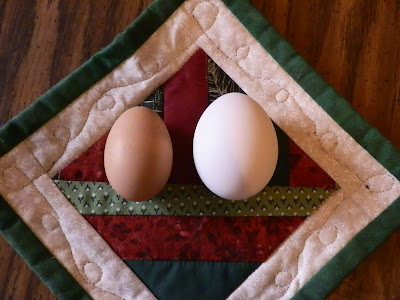
Beyond the fact that its an adorable tiny egg - its also our first egg from our young ladies!
My only regret this year is that all my hens are brown layers.
Tomorrow I'm going to see if I can figure out which lovely lady laid this for us.
For tonight, we celebrate new beginnings and more to come!


New Growth - Plum Health


My Stanley Plums new straight leaves!
You can see where something tried to take a few bites out of the newer leaves, so I've continued spraying the tree with water/soap every week or so at night.
Thankfully the new leaves show that an infestation hasn't taken hold a second time.
See Curled Plum Leaves and how I treated them

We bought 4 Concorde Seedless Grape vines to plant,
picked up the bare root cuttings April 25th and soaked them in wet paper for a few days before planting.
Two of the grape's took off almost over night and are over a foot each with lots of growth.
The above grape was my last hold out.
Earlier this week we FINALLY got a leaf to sprout!
Never stop watering grape vines, they are tough and resilient.

This was the other grape that was struggling to survive for a while
but is growing happily now.
Two years from now those vines will be massive and cover tons of fence line!


These grapes came with our house.
The vine had been neglected and looked horrible, we looked up advice and cut the entire plant back to root.
Three years later we are getting some fantastic looking grapes and I can't wait to find out what type they are!

Also my Thornless Blackberries are outpacing my coffee addiction!
They are growing so fast and so much that no matter how quickly I get the leaves to turn green, they flip back around and yellow again!
Next winter instead of putting our coffee grinds on the compost pile I'm freezing it to use on my blackberries next summer!
This is their second summer and I could not have predicted this many berries!

Friday, June 16, 2017

Our Bit of Dirt

Our Bit of Dirt

Previously I've stated that we have a very small urban homestead.
Our property is roughly one quarter acre large. (small)
Yet we've fit so much!


The black and white version shows everything listed out.
*forgot my compost pile - its on the drive way near the large shed*
Sorry for my bad handwriting.
My husband found this amazing program to create a mock up our full yard.
It even has a 3D walk through option - haven't yet figured out how to share that.

What these photos show is what we currently have.
My darling
(and very patient husband)
also made a mock up of our future plans.


One day we would love to move to proper rural land with several acres.
We'd love to have pigs, goats and a cow.
Until then we have chickens and rabbits,
with future plans for ducks and bee's.
Its amazing what you can fit into a small area.
This last year we've focused on returning crops - last year we added in the berries.
This year we added tree's and grapes.

We also focus on different things each year.
Last year I grew cucumbers, cucumbers and even more cucumbers.
So much that I have several years of sweet pickle relish.
Next year I will be planting one trellis of cucumbers, as we've really eaten down my dill pickles.
Found out those are a family favorite.

Last year I made both Plum Jam and Plum BBQ Sauce.
Next time it will ALL be Plum Jam.
While the BBQ Sauce tasted great, my family is addicted to the jam and are currently fighting over my last quart.

This year is also my first year planting onions, as well as successfully growing potatoes.
Here's hoping the potato harvest is a great as think it will be.
Next year I plan on increasing my potato area, future plans are to grow a full year supply for my family.
We increased our garlic patch last year - we LOVE garlic.
As it was last years garlic almost lasted us a year.
Last years carrots almost lasted us a year as well.

I never knew that my gardening goals would go from a summer supply of fresh healthy food to wanting to grow enough for a full year!
No matter the reason (saving money, healthier, no GMO, no pesticides ect)
home grown food just tastes better!


Thursday, June 15, 2017

Our Hen House


Our New Ladies!
We finished butchering our older ladies, we cycle our ladies out every two years.
That way the oldest our hens will be is 2 1/2 years old.
Still young enough to be edible without being extremely tough.
When raising chickens you have two good options and one really bad one.

1. Cycle out your chickens every few years to keep a young egg laying flock.

2. Keep your flock until they die of old age, because they are family.
#1 problem with #2 is space. Most cities have limits on how many chickens you can have at a time.
We can't afford to feed a non laying flock.

3. Give away your two year old flock to someone new to chickens who doesn't understand you just gave them a whole flock of birds that will cost them a lot in feed cost and produce fewer eggs.
#3 May sound terrible, yet every spring I see people "giving" away egg laying hen's all 2 years old and healthy.
I am not a fan of #3.

Our Hen House


Silver Laced Wyandotte's

Esther – Purple
Celia – White
Arya – Pink
Sookie – Yellow


Black Astrolorp's

River – Red
Katniss – Green
Nicci – Purple
Lena – Pink


Rhode Island Red's

Ginny – Yellow
Jensen – Red
Saphira - Green

~~~

As you can see, we've put bands on the legs of our ladies.
Normally as a rule, you don't NAME an animal you will eat at some point in time.
However when it comes to my chickens and the fact that they aren't a quick turn around animal.
We name and band them - it helps us keep track of each animals health.
If you need to keep track but not get attached
(which you will do anyway chickens are fun & quirky)
band and label by color.

We got our new hen's in January, so they should start laying in the next two or three weeks!
A few are starting to show signs of squatting - which shows they will soon be laying eggs!

Also like all my hens, my ladies are named after some of my favorite written characters.

Friday, June 9, 2017

Hilling Potatoes


Hard to see but that is a 12 inch ruler.
You don't want your potato plant to grow over 12 inches, so as it grows you need to hill it.
  Dirt layer

Compost layer

Each time I hill I add lots of composted material, hay & rabbit poop is my main go to as the plants are literally 6 feet from my grow out bunny pen.
You want the potato to be able to easily grow potatoes and not spend so much energy fighting against the dirt.
However I like adding a layer of dirt to a layer of compost as it helps hold its shape as well as keep water in my growing large mound!
They are growing SO FAST! Here is what they looked like mid May.

Crossing my fingers this year I get a great potato harvest!
Last time we were not prepared!
Didn't plan or research enough and got three teeny tiny things instead of lovely potatoes.
However at the moment everything thing looks perfect!